With ongoing enhancement of the HMI (Human Machine Interface) technology, sophisticated design and high operability has become a requirement to enhance the value of a product. Therefore, demand for the capacitive touch sensor is becoming higher, because it allows various materials such as wood and transparent acrylic to be adopted as an operation panel according to the concept of the housing design and can easily realize high usability with LED lights as a user guide. However, even if you want to implement the capacitive touch sensor into your HMI, some may consider its evaluation as a high hurdle to overcome.
Renesas offers boards for the RX family MCUs such as the Renesas Solution Starter Kit (RSSK) and the Renesas Starter Kit (RSK) so that users can immediately evaluate the capacitive touch sensor. In this blog, I will introduce how to make an initial evaluation of the capacitive touch sensor using the most inexpensive and basic board, the ”Target Board” with a simple work to connect to the touch electrode.
The Target Board is the most suitable evaluation board for initial deployment consideration, which provides access to all the MCU signal pins and is easy to purchase for around 3,000 JPY (approx. U$30). The specification of the conventional Target Board did not allow for the implementation of the LPF capacitors required for the touch operation, and the evaluation was difficult. In the “Target Board for RX140” that has the latest RX140 MCU, Renesas provides the patterns for cutting for LPF capacitor connection, making initial evaluation of the touch features possible.
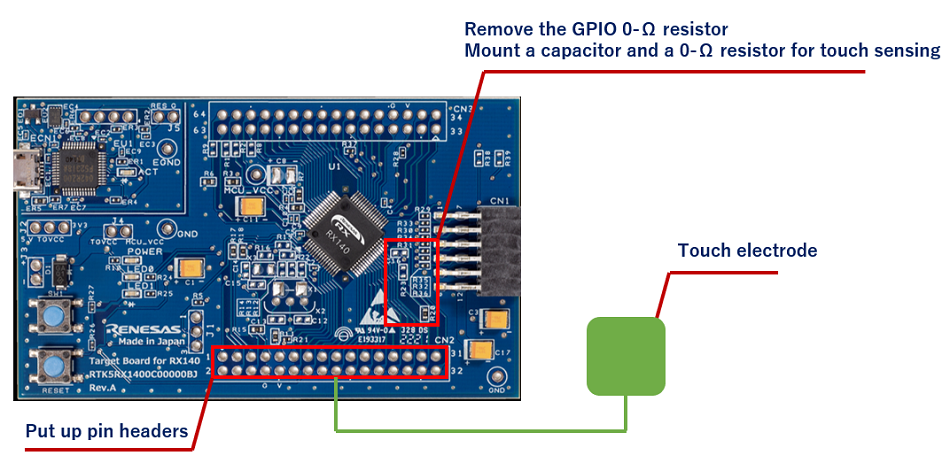
At first, following the circuit schematics of this board and the user’s manual, remove the GPIO 0-Ω resistor connected to the TSCAP pin on the RX140 MCU, and mount a capacitor and a 0-Ω resistor for touch sensing. Next, mount pin headers on the through holes on the board to connect to the touch electrode. For the design of electrodes, please refer to “CTSU Capacitive Touch Electrode Design Guide”.
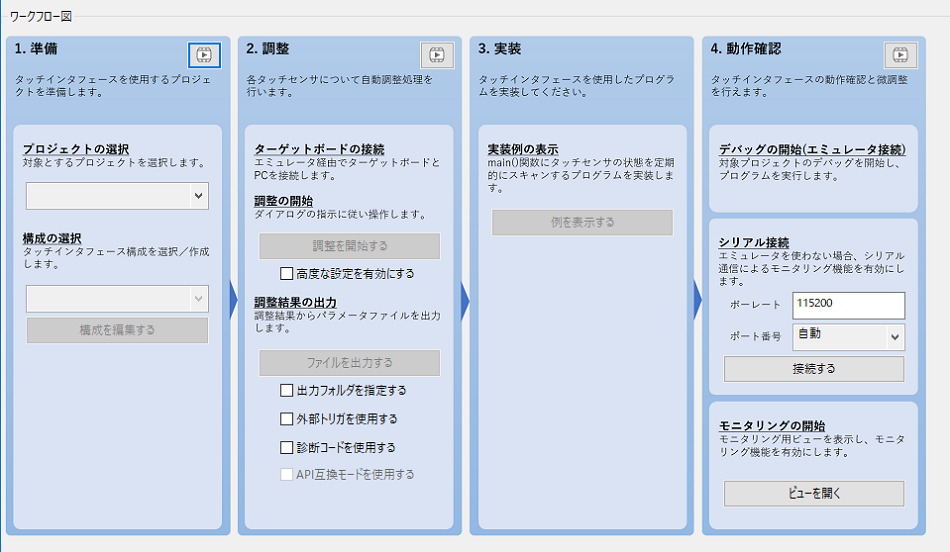
After the board is prepared, start Renesas Integrated Development Environment, e2 studio, and create a new project. When creating a project, you can easily set the MCU clock, pins, and peripheral functions and download the driver by checking “Use Smart Configurator”. In addition, install a development support tool for capacitive touch sensing, QE for Capacitive Touch, as a plug-in, making it possible to generate a touch detection program automatically, monitor measurement values, and adjust parameters with GUI easily. For details on creating a program that uses the capacitive touch sensor, refer to the ”Using QE and FIT to Develop Capacitive Touch Applications”.
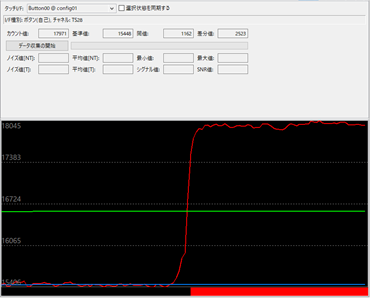
Writing the program to the RX140 MCU and start debugging, you can visually check the touch detection in the monitor window of the QE for Capacitive Touch in real time.
Renesas offers fulfilling software to support users’ development and development tools with high functionality and usability, etc. These items can help anyone evaluate the capacitive touch sensor easily. Please try it!
For details on the capacitive touch sensor solution, visit here.