
Overview
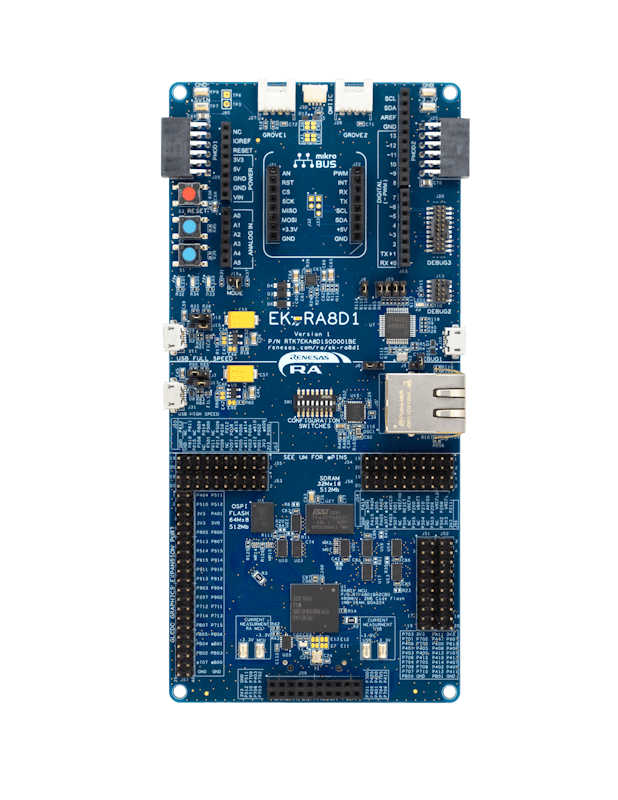
The EK-RA8D1 evaluation kit enables users to effortlessly evaluate the features of the RA8D1 MCU Group and develop embedded systems applications using Renesas' Flexible Software Package (FSP) and e2 studio IDE. Utilize rich onboard features along with your choice of popular ecosystem add-ons to bring your big ideas to life.
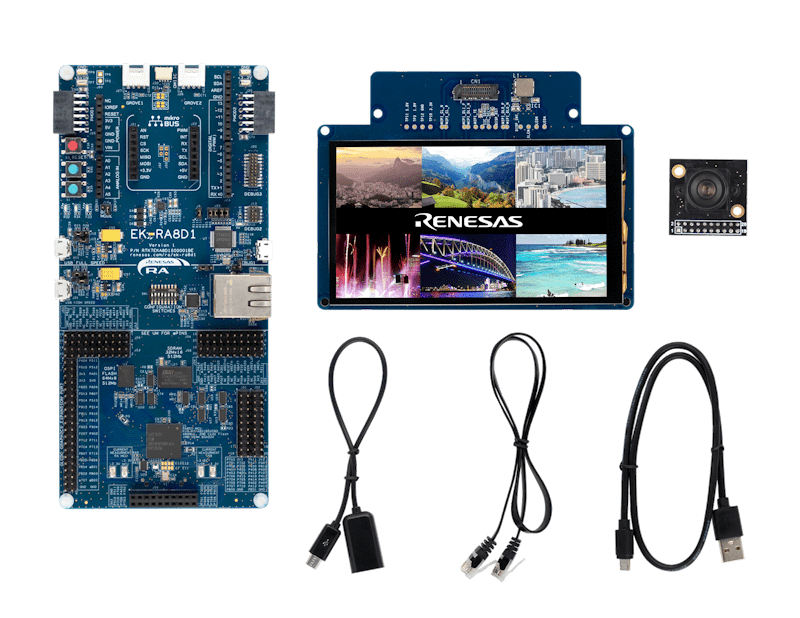
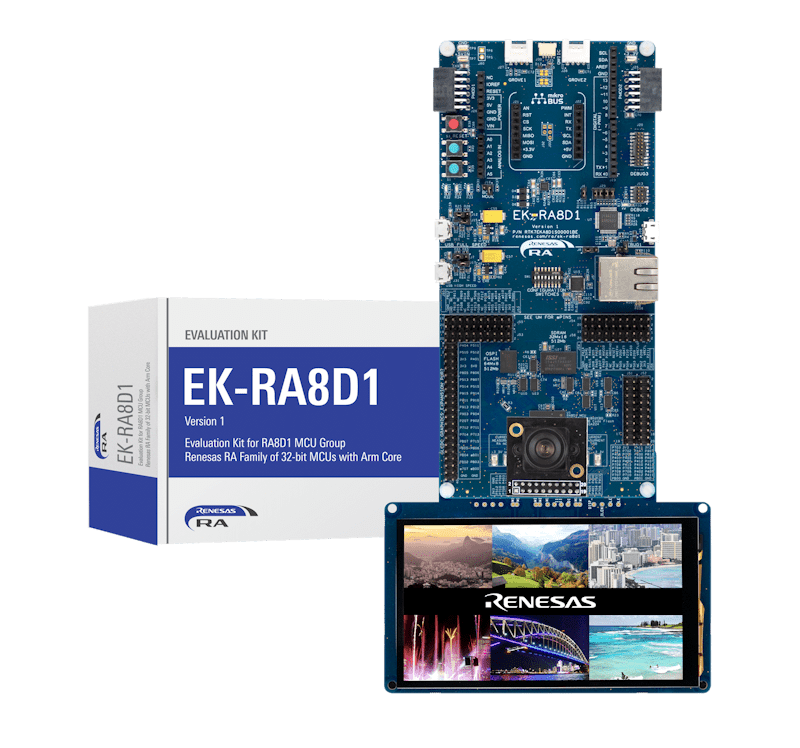
The EK-RA8D1 kit consists of three boards: the EK-RA8D1 board featuring the RA8D1 MCU with on-chip graphics LCD controller, a MIPI graphics expansion board featuring a 4.5-inch TFT color LCD (480 x 854) with capacitive touch overlay, and a camera expansion board featuring a 3M pixels CMOS image sensor.
Getting Started
Running the Quick Start Example Project
- The EK-RA8D1 board comes pre-programmed with a quick start example project (source code provided in the EK-RA8D1 example project bundle).
- Connect the MIPI graphics and camera expansion boards to the MIPI graphics (J58) and camera (J59) expansion ports on the EK-RA8D1 board.
- Power up the EK-RA8D1 board through the USB debug port (J10) using the micro USB device cable connected to a 5V power source. The white power LED will light up.
- The quick start example project will begin to execute showing the graphic elements on the screen.
- Refer to the EK-RA8D1 Quick Start Guide to explore additional functionality of the quick start example project.
Developing Embedded Applications
- Modifying the Quick Start example project – refer to the EK-RA8D1 Quick Start Guide for instructions on importing, modifying, and building the quick start example project.
- Start with one of the many other example projects (provided in the EK-RA8D1 example project's bundle) – choose from many example projects to learn about different peripherals of the RA8D1 MCU group. These example projects can serve as excellent starting points for you to develop your custom applications.
Building Custom Hardware
- Start by building a functional prototype - utilize the EK-RA8D1 board with your choice of ecosystem add-ons.
- Build custom hardware – develop custom hardware by referring to the design and manufacturing information provided in the EK-RA8D1v1 Design Package.
Features
- Special Feature Access:
- MIPI DSI and Parallel Graphics Expansion Ports
- Camera Expansion Port
- Ethernet
- USB High-Speed Host and Device
- 64MB SDRAM
- 64MB External Octo-SPI Flash
- MCU Native Pin Access:
- R7FA8D1BHECBD MCU
- 480MHz, Arm® Cortex®-M85 core
- 2MB Code Flash, 1MB SRAM
- 224 pins, BGA package, 13mm x 13mm x 1.47mm, 0.8mm pitch
- Native pin access
- MCU and USB current measurement
- DC/DC mode configuration
- Ecosystem and System Control Access:
- USB Full Speed Host and Device
- Multiple 5V input sources:
- USB (debug, full speed, high speed)
- External power supply
- SEGGER J-Link™ onboard programmer and debugger
- Debug modes:
- Debug onboard (SWD) – via J-Link
- Debug out (SWD) – via J-Link
- Debug in (ETM, SWD and JTAG) – via J-Link, Arm® Keil® ULINK™, IAR I-jet™, Renesas E2/E2 Lite, etc.
- User LEDs and buttons:
- Three user LEDs (red, blue, green)
- Power LED (white) indicating the availability of regulated power
- Debug LED (yellow) indicating the debug connection
- Two user buttons
- One reset button
- Five most popular ecosystem expansions:
- MikroElektronika™ mikroBUS connector
- SparkFun® Qwiic® connectors (may not be populated)
- Two SeeedGrove® system (I2C and analog) connectors (may not be populated)
- Two Digilent Pmod™ (SPI and UART) connectors
- Arduino® (UNO R3) connector
- MCU boot configuration
- MIPI Graphics Expansion Board:
- 4.5 Inch backlit TFT display, 16.7M display colors
- 480x854 pixels resolution
- 2-lane MIPI interface
- Capacitive touch overlay (I2C)
- Camera Expansion Board:
- Off-the-shelf Arducam CMOS OV3640 Camera Module
- ¼ Inch 3.1 Megapixel image sensor
- Up to 15 fps in QXGA (2048x1536 pixels) resolution
Getting Started
Explore Ready-to-Run Solutions
Sample & Buy

Evaluation Kit for the RA8D1 MCU Group
| Description: | Evaluation Kit for the RA8D1 MCU Group |
| HTS (US): | 8471.50.0150 |
| ECCN (US): | 3A991.a.2 |
| SPQ: | 1 |
| Pb (Lead) Free: | No |
| Assembly Location: | CHINA |
Add-on Hardware

Evaluation Kit for RA8M1 MCU Group
Videos & Training
Learn how to access data flash on the RA8D1 Evaluation Kit by performing erase, blank check, write, and read operations using the Flexible Software Package (FSP). We demonstrate how data flash background operation (BGO) enables execution from code flash during programming and erase. We also explain secure and non‑secure data flash access using Arm® TrustZone® technology. The project shows how flash management supports reliable and secure embedded system design.
Additional Videos
News & Blog Posts
News Dec 12, 2023 |
Blog Post Dec 12, 2023 |
Blog Post Jan 28, 2022 |
Blog Post Jan 28, 2022 |
Blog Post Nov 18, 2021 |
Blog Post Nov 11, 2021 |
Support
Support Communities
- I-002A Fundamentals of FSP (Non-TrustZone) EK-RA8D1 FSP 5.5.0
Materials for I-002A Fundamentals of FSP on EK-RA8D1 and FSP 5.5.0. Materials for I-002A Fundamentals of FSP on EK-RA8D1 and FSP 5.5.0.
- I downloaded the EK-RA8D1 Design Files. Is there an actual design file for the Schematic (not just the pdf)? If so, what is the file name and what application created it?
I am designing my own RA8D1 board. I want to use the EK-RA8D1 design files as a reference. I see a board design file in the package, but I don't see a schematic file (other than the pdf). I don't see a schematic design file which I ...
Jul 3, 2024 - Error MCUBoot bootloader testing in EK-RA8D1
Hi, I am currently testing the MCUBoot bootloader for the RA8D1 in Evaluation KitI have created, configured and built both the bootloader and bare metal blinky application from scratch following a tutorial How to Implement Secure Bootloader on RA6M5 Evaluation Kit Using MCUboot.FSP Version 6.2.0At the stage ...
Jun 27, 2026
Knowledge Base
- RA and FSP Curriculum : Getting Started with EK-RA8D1 Graphics Application Embedded Wizard
Last Updated: 30 Oct 2024 This lab material explains all necessary steps to create an Embedded Wizard UI application suitable for RA8D1 Evaluation Kit. Getting Started with EK-RA8D1 Graphics Application Embedded Wizard for FSP 5.5.0 - a hands on lab using EK-RA8D1, Embedded Wizard Studio and FSP ...
Oct 30, 2024 - RA Family: J-Link: Reset External Flash Before Programming
... behavior (e.g. add additional steps). This is especially useful for hardware that requires special handling. The provided example script (RA8D1_OSPI.JLinkScript) for the EK-RA8D1 manually controls the GPIO connected to the OSPI reset pin by directly writing to the PmnPFS register (which requires unlocking in the PWPR ...
Oct 29, 2025 - RA Family: Understanding BusFault error on QSPI/OSPI memory
... by incorrect address fetches, DQS timeouts, and other related issues. Example) Incorrect Read Command Code and Dummy Cycles set as show below, not matching the EK-RA8D1's OSPI memory specification. QSPI/OSPI flash update failure during debug launch The SEGGER J-Link external flash programming software executed during ...
Nov 19, 2025

Support Communities

