Migrating between Integrated Development Environments
- |
- |
Overview
![]()
The following methods are available for porting projects created for different compilers in the CS+ environment.
- Utilize an existing project to create a new CS+ project
- Create a new project in CS+ and register existing source files
| Process | Utilize an Existing Project | Create a New Project |
|---|---|---|
| Source file registration | Automatic | Manual |
| Option setting | (Partially) automatic | Manual |
| Source file folder location | The folder structure should be the same as that of the existing project. (Note1) | No care needs to be taken regarding the file registration location. |
| Conflict between source files and automatically generated files | Files should be modified after a project is created. | Care should be taken regarding conflict at manual file registration. |
Note
- Since the source files are not actually converted, a build error may occur if the structures of folders differ and the paths to the folders are not specified. CS+ supports the conversion of source files created for the CA78K0R compiler to CC-RL projects.
Utilize an Existing Project to Create a New CS+ Project
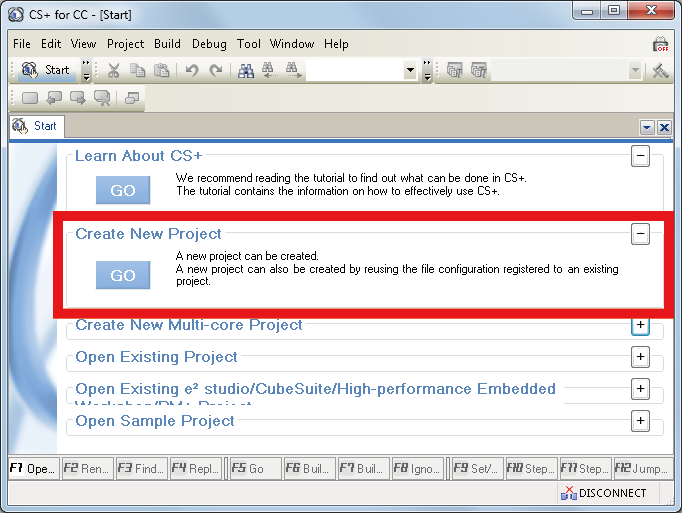
Click on [Create New Project] in the startup screen of CS+. Select the [Pass the file composition of an existing project to the new project] checkbox and specify the project to utilize.
Note: If you create the new project in the same folder as the project being utilized, the relationships with header files which are included with relative paths from the project folder will be the same. However, if a file with the same name as an automatically generated file exists, a message will be output requesting that you confirm whether or not the file is to be saved as a *.bak file. Rename the file after the project has been generated.

Create a New Project in CS+ and Register Existing Source Files
- Click on [Create New Project] in the startup screen of CS+.
- In the [Create Project] dialog box of CS+, select the type of microcontroller in [Microcontroller] and the particular device in [Using microcontroller], labeled (1) and (2) at right, set a name for the project in [Project name] and the place where it is to be stored in [Place], both labeled (3), and then click on the [Create] button.
- For example, select [RH850] and [RH850/E1L] for [Microcontroller] and [Using microcontroller], respectively.
![[Create Project] dialog box of CS+](/sites/default/files/media/images/migration-csplus-new-02.png)
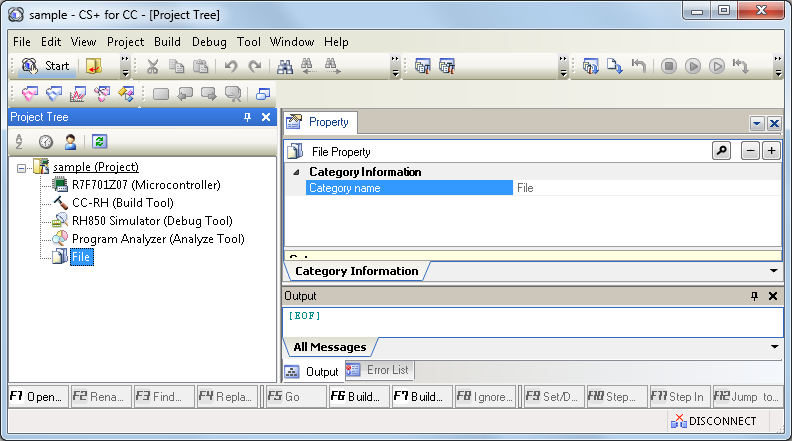
- A screenshot of the CS+ window right after creating a new project
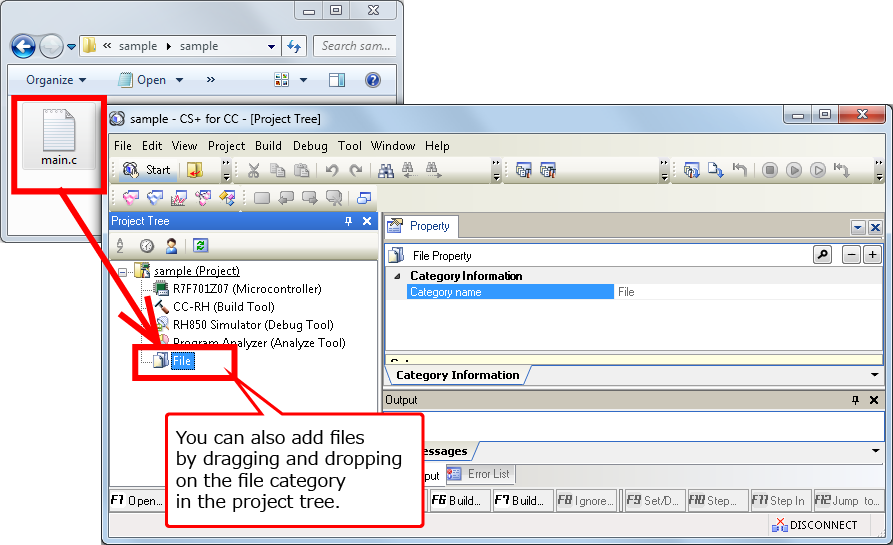
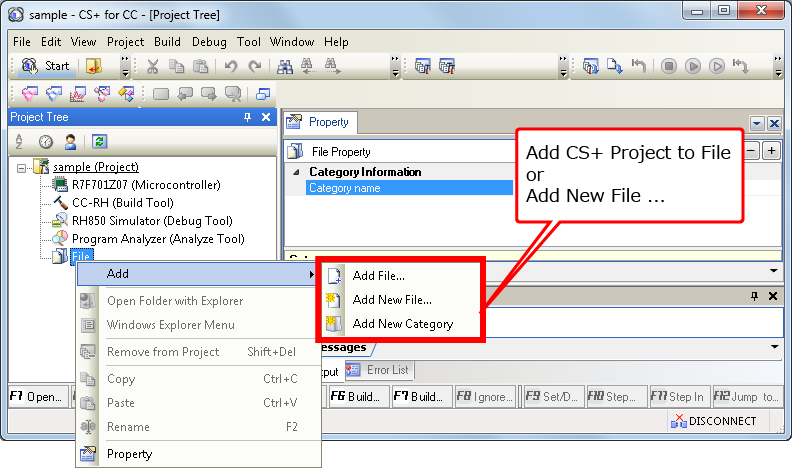
- Add the existing source files to the file branch of the [Project Tree]. New files can also be added.
- You can also add files by dragging and dropping on the file category in the project tree.