Overview:
GR-LYCHEE provides libraries to make programs with OpenCV 3.2 C++. You can detect faces and perform image processing on images acquired from the camera.
Since the Renesas RZ/A1LU MPU mounted on the GR-LYCHEE board has 3MB of RAM, what can be processed is limited. Also, the memory to be written to the ROM also becomes large, and the write time becomes long to about 30 seconds, please be aware of this.
Preparation
Hardware
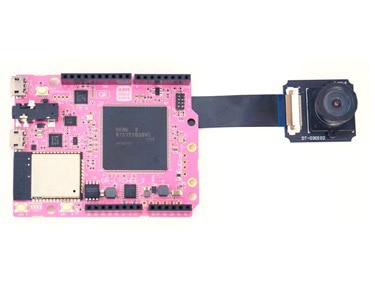
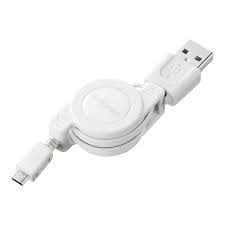
Prepare the GR-LYCHEE board and a USB cable (Micro B type). For details on how to install the camera, refer to the How to Attach the Camera, Accessories, LCD project.
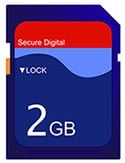
If you have an SD card, you can also try face detection samples later.
Software
Download and unzip the DisplayApp file. It is an application for checking the camera image with a PC.
OpenCV Project Creation
For Web Compiler
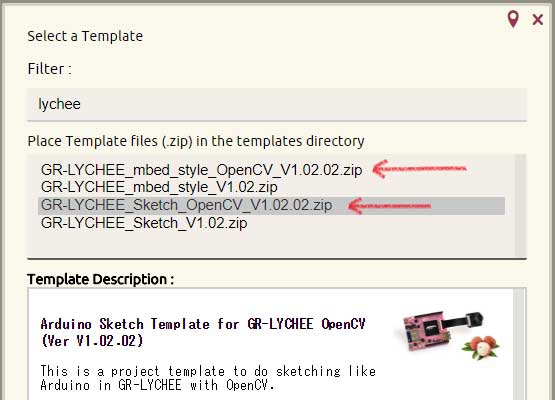
On the new project creation screen, a template for OpenCV is prepared as shown here, choose whether to create an Arduino-like sketch or an Mbed style program.
For IDE for GR
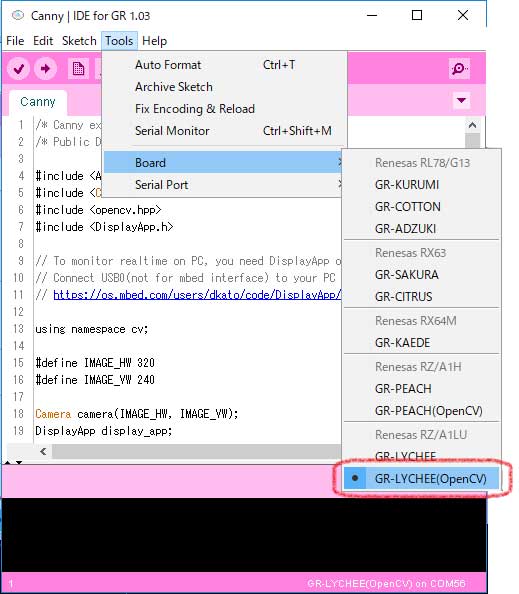
From the menu select [Tools] -> [Board] -> [GR-LYCHEE (OpenCV)].
Try OpenCV
Let's try executing the following program.
Since programming takes about 30 seconds, please do not disconnect the USB cable until the Mbed drive is recognized again after writing is completed.
    #include <Arduino.h>
    #include <Camera.h>
    #include <opencv.hpp>
    #include <DisplayApp.h>
    using namespace cv;

    #define IMAGE_HW 320
    #define IMAGE_VW 240
    #define DEMO_NUMBER   4
    #define LOOP_WAITTIME 16

    static Camera camera(IMAGE_HW, IMAGE_VW);
    static DisplayApp display_app;
    static uint8_t g_mode = 0;

    void ub0_interrupt() {
      while (digitalRead(PIN_SW0) == LOW)
        ;
      g_mode++;
      if (g_mode >= DEMO_NUMBER)
        g_mode = 0;
    }

    void setup() {
      Serial.begin(9600);
      pinMode(PIN_SW0, INPUT);
      pinMode(PIN_LED_RED, OUTPUT);
      digitalWrite(PIN_LED_RED, LOW);
      camera.begin();
      attachInterrupt(4, ub0_interrupt, FALLING);
    }

    void loop() {
      static unsigned long loop_time = millis();

      while ((millis() - loop_time) < LOOP_WAITTIME)
        ; //
      Mat img_raw(IMAGE_VW, IMAGE_HW, CV_8UC2, camera.getImageAdr());

      if (g_mode == 0) {
        ///////////////////////////////////
        // MODE0: Original Image
        ///////////////////////////////////
        display_app.SendJpeg(camera.getJpegAdr(), (int) camera.createJpeg());
        loop_time = millis();
      }
      else if (g_mode == 1) {
        ///////////////////////////////////
        // MODE1: Canny
        ///////////////////////////////////
        Mat src, dst;
        cvtColor(img_raw, src, COLOR_YUV2GRAY_YUYV); //covert from YUV to GRAY
        Canny(src, dst, 50, 150); // Canny
        size_t jpegSize = camera.createJpeg(IMAGE_HW, IMAGE_VW, dst.data,
        Camera::FORMAT_GRAY);
        display_app.SendJpeg(camera.getJpegAdr(), jpegSize);
        loop_time = millis();
      }
      else if (g_mode == 2) {
        ///////////////////////////////////
        // MODE2: Drawing
        ///////////////////////////////////
        static int x = 0, y = 0, ax = 10, ay = 10;
        Scalar red(0, 0, 255), green(0, 255, 0), blue(255, 0, 0);
        Scalar yellow = red + green;
        Scalar white = Scalar::all(255);
        Scalar pink = Scalar(154, 51, 255);

        Mat img_raw(IMAGE_VW, IMAGE_HW, CV_8UC2, camera.getImageAdr());

        Mat src;
        cvtColor(img_raw, src, COLOR_YUV2BGR_YUYV); //covert YUV to RGB

        x += ax;
        y += ay;
        if (x > (src.cols - 10) || x < 10) {
          ax *= -1;
        }
        if (y > (src.rows - 10) || y < 10) {
          ay *= -1;
        }

        line(src, Point(10, 10), Point(src.cols - 10, 10), blue, 3, LINE_AA); //Line
        line(src, Point(10, src.rows - 10), Point(src.cols - 10, src.rows - 10),
        blue, 3, LINE_AA); //Line
        rectangle(src, Point(10, 30), Point(src.cols - 10, 60), white, FILLED);
        putText(src, "Gadget Renesas", Point(15, 55), FONT_HERSHEY_COMPLEX, 1,
        pink, 2);
        circle(src, Point(x, y), 10, yellow, FILLED);

        stringstream ss;
        ss << x << ", " << y;
        putText(src, ss.str(), Point(10, src.rows - 20),
        FONT_HERSHEY_SCRIPT_SIMPLEX, 1, white, 1);

        size_t jpegSize = camera.createJpeg(IMAGE_HW, IMAGE_VW, src.data,
        Camera::FORMAT_RGB888);
        display_app.SendJpeg(camera.getJpegAdr(), jpegSize);
        loop_time = millis();
      }
      else if (g_mode == 3) {
        ///////////////////////////////////
        // MODE3: MovingDetection
        ///////////////////////////////////
        Mat img_raw(IMAGE_VW, IMAGE_HW, CV_8UC2, camera.getImageAdr());
        Mat src, diff, srcFloat, dstFloat, diffFloat;
        dstFloat.create(IMAGE_VW, IMAGE_HW, CV_32FC1);
        dstFloat.setTo(0.0);

        while (g_mode == 3) {
          cvtColor(img_raw, src, COLOR_YUV2GRAY_YUYV); //covert from YUV to GRAY

          src.convertTo(srcFloat, CV_32FC1, 1 / 255.0);
          addWeighted(srcFloat, 0.01, dstFloat, 0.99, 0, dstFloat, -1);
          absdiff(srcFloat, dstFloat, diffFloat);
          diffFloat.convertTo(diff, CV_8UC1, 255.0);

          size_t jpegSize = camera.createJpeg(IMAGE_HW, IMAGE_VW, diff.data,
          Camera::FORMAT_GRAY);
          display_app.SendJpeg(camera.getJpegAdr(), jpegSize);
          loop_time = millis();
        }

      }

    }
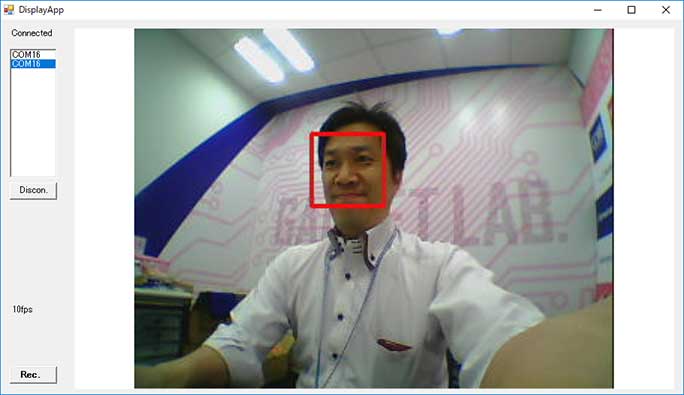
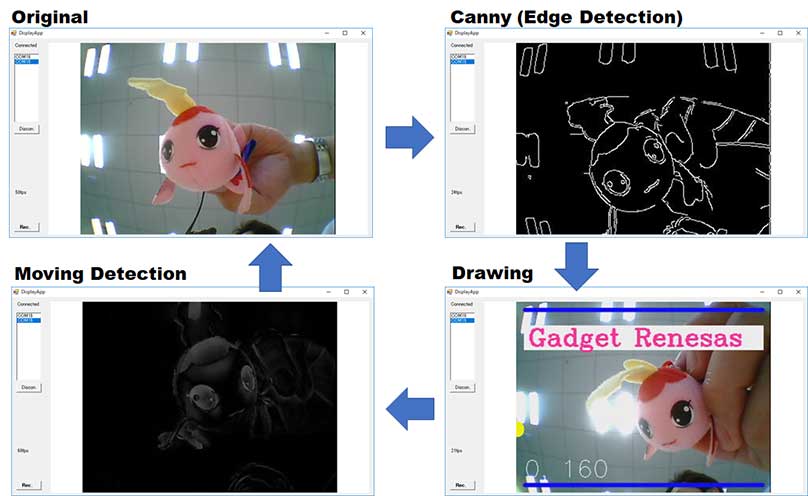
Connect the USB cable to USB0 of GR-LYCHEE and check the image with DisplayApp. When you press the UB0 button, the mode switches as shown in the images to the right; you can see OpenCV edge detection, drawing and difference detection processing.
Face Detection
Let's next try facial detection. Save the cascade file "lbpcascade_frontalface.xml" on the SD card.
- Right click on the following link and save "Save file as" to download.
lbpcascade_frontalface Cascade File (XML)
After saving the file, insert the SD card into GR-LYCHEE and execute the following sketch.
    /* Face detection example with OpenCV */
    /* Public Domain             */

    #include <Arduino.h>
    #include  <Camera.h>
    #include  <opencv.hpp>
    #include  <DisplayApp.h>

    // To monitor realtime on PC, you need DisplayApp on following site.
    // Connect USB0(not for mbed interface) to your PC
    // https://os.mbed.com/users/dkato/code/DisplayApp/
    #include "mbed.h"
    #include "SdUsbConnect.h"

    #define IMAGE_HW 320
    #define IMAGE_VW 240
    using namespace cv;

    /* FACE DETECTOR Parameters */
    #define DETECTOR_SCALE_FACTOR (2)
    #define DETECTOR_MIN_NEIGHBOR (4)
    #define DETECTOR_MIN_SIZE     (30)
    #define FACE_DETECTOR_MODEL     "/storage/lbpcascade_frontalface.xml"


    static Camera camera(IMAGE_HW, IMAGE_VW);
    static DisplayApp  display_app;
    static CascadeClassifier detector_classifier;

    void setup() {
        pinMode(PIN_LED_GREEN, OUTPUT);
        pinMode(PIN_LED_RED, OUTPUT);

        // Camera
        camera.begin();

        // SD & USB
        SdUsbConnect storage("storage");
        storage.wait_connect();

        // Load the cascade classifier file
        detector_classifier.load(FACE_DETECTOR_MODEL);

        if (detector_classifier.empty()) {
            digitalWrite(PIN_LED_RED, HIGH); // Error
            CV_Assert(0);
            mbed_die();
        }
    }

    void loop(){
        Mat img_raw(IMAGE_VW, IMAGE_HW, CV_8UC2, camera.getImageAdr());

        Mat src;
        cvtColor(img_raw, src, COLOR_YUV2GRAY_YUYV); //covert from YUV to GRAY

        // Detect a face in the frame
        Rect face_roi;
        if (detector_classifier.empty()) {
            digitalWrite(PIN_LED_RED, HIGH); // Error
        }

        // Perform detected the biggest face
        std::vector <Rect> rect_faces;
        detector_classifier.detectMultiScale(src, rect_faces,
                                             DETECTOR_SCALE_FACTOR,
                                             DETECTOR_MIN_NEIGHBOR,
                                             CASCADE_FIND_BIGGEST_OBJECT,
                                             Size(DETECTOR_MIN_SIZE, DETECTOR_MIN_SIZE));

        if (rect_faces.size() > 0) {
            // A face is detected
            face_roi = rect_faces[0];
        } else {
            // No face is detected, set an invalid rectangle
            face_roi.x = -1;
            face_roi.y = -1;
            face_roi.width = -1;
            face_roi.height = -1;
        }

        if (face_roi.width > 0 && face_roi.height > 0) {   // A face is detected
            digitalWrite(PIN_LED_GREEN, HIGH);
            printf("Detected a face X:%d Y:%d W:%d H:%d\n",face_roi.x, face_roi.y, face_roi.width, face_roi.height);
            digitalWrite(PIN_LED_GREEN, LOW);
        } else {
        }

        Mat dst;
        cvtColor(img_raw, dst, COLOR_YUV2BGR_YUYV); //covert from YUV to BGR
        Scalar red(0, 0, 255), green(0, 255, 0), blue(255, 0, 0);

        rectangle(dst, Point(face_roi.x, face_roi.y), Point(face_roi.x + face_roi.width, face_roi.y + face_roi.height), red, 2);
        size_t jpegSize = camera.createJpeg(IMAGE_HW, IMAGE_VW, dst.data, Camera::FORMAT_RGB888);
        display_app.SendJpeg(camera.getJpegAdr(), jpegSize);
    }
Connect the USB cable to USB0 on GR-LYCHEE and check the image with DisplayApp. We perform face detection as shown here.
