Let's Make a Game Using a Microcontroller - Part 1
Image
Sota Shinohara
Application Engineer
Published: May 30, 2023
Here's a procedure that even beginners can use to easily create a game using a microcontroller.
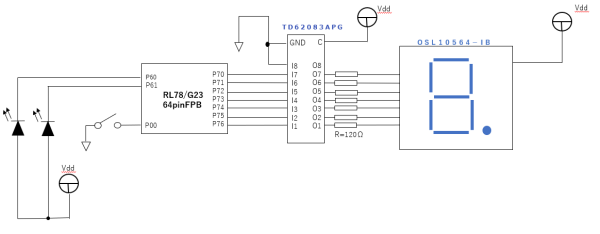
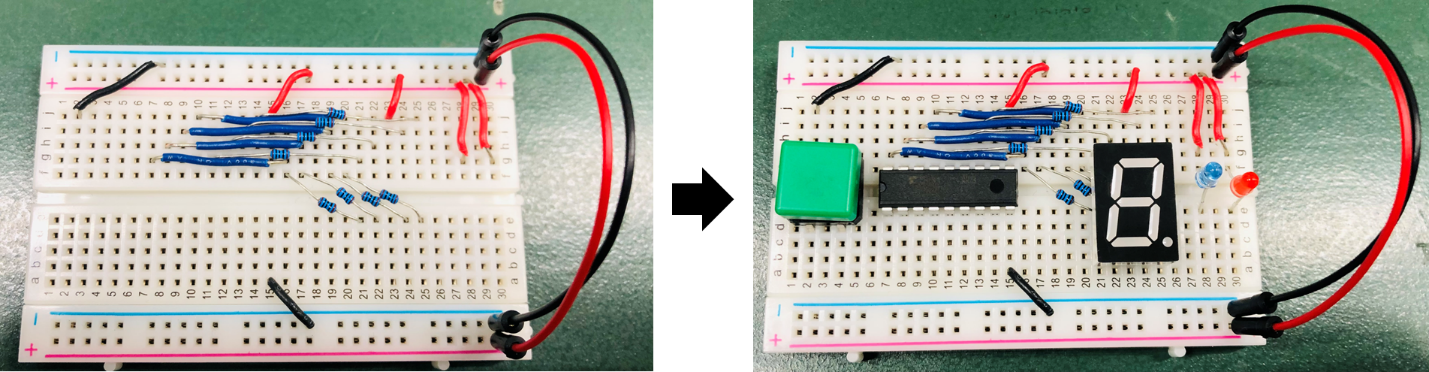
The RL78 microcontroller has a cheap and easy-to-use development environment available. For this tutorial, we used the RL78/G23 Fast Prototyping Board (FPB) to create a mole-catching game.
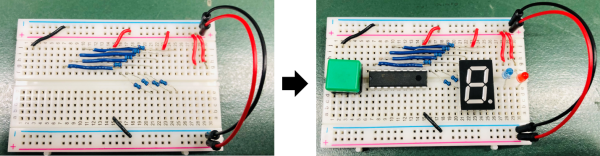
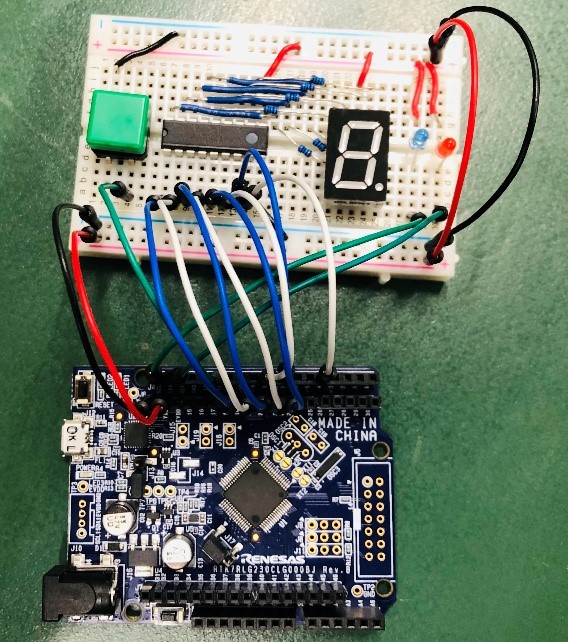
First, let me explain the mole-catching game. The game randomly lights up the segments of a 7-segment LED at fixed time intervals, and the player has to press the button at the moment when the decimal point is lit up. If the player manages to stop the decimal point, then they have successfully caught the mole (as shown in Figure 1).
Image
Figure 1
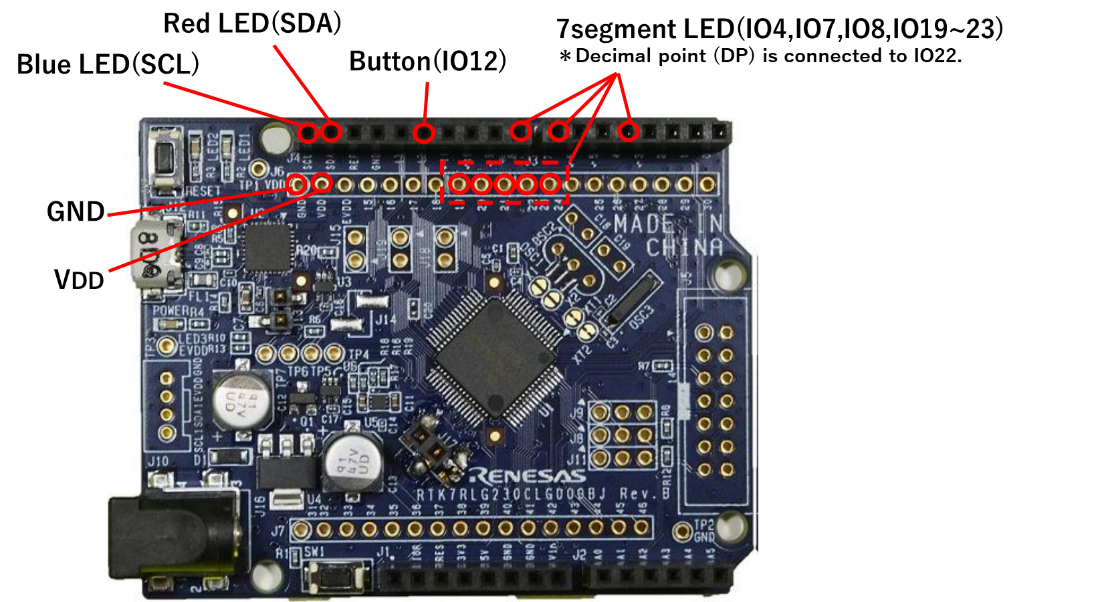
To create the mole-catching game, please obtain the following necessary components from your favorite online shopping site or other sources.
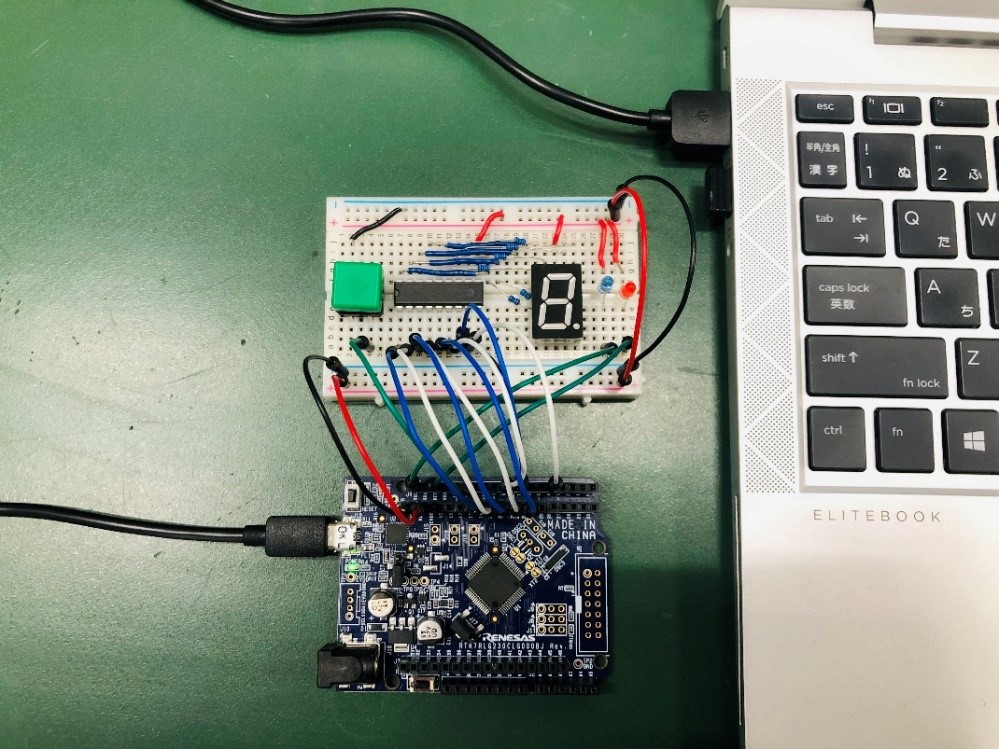
Connect the USB cable to both the PC and the microcontroller as shown in Figure 7.
Image
Fig.7
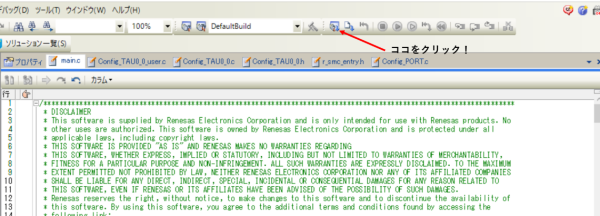
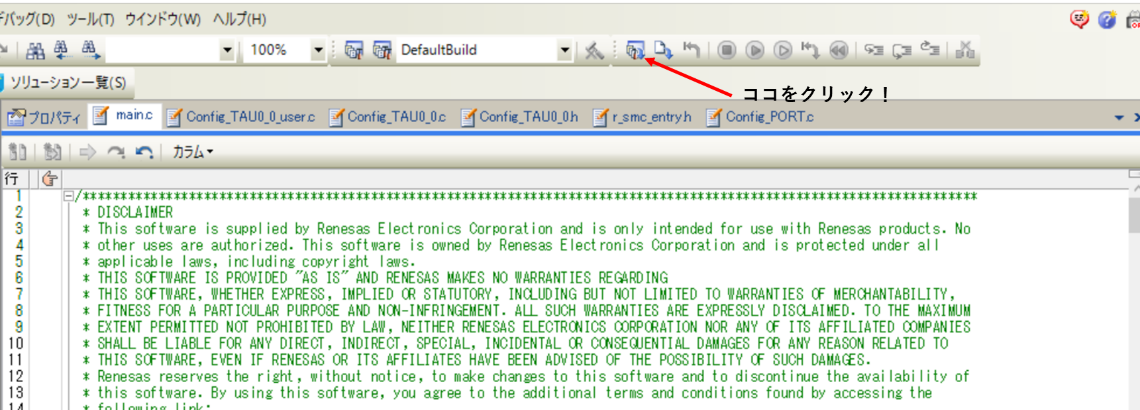
Debug the code using CS+, see Figure 8 for reference.
Debug the code that you downloaded earlier using CS+.
Image
Fig.8
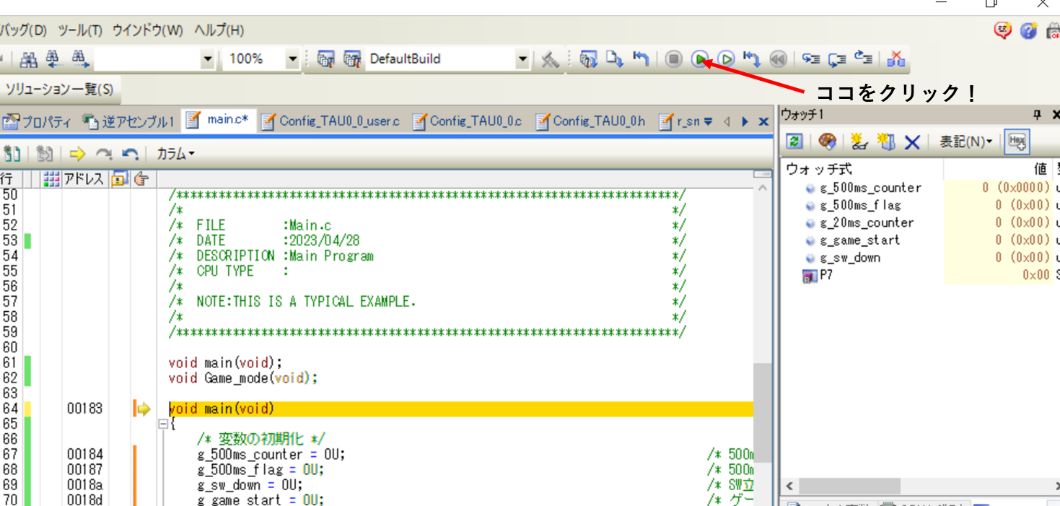
Run the program.
After debugging, run the program as demonstrated in Figure 9.
Image
Fig.9
Once the program is debugged, it is written into the microcontroller. The program that was debugged once is stored in the microcontroller, so you can operate it just by supplying power without debugging with CS+ next time. However, if you want to operate the microcontroller alone without using a PC, you need to use programming software such as RFP to write the program again.
It worked correctly.
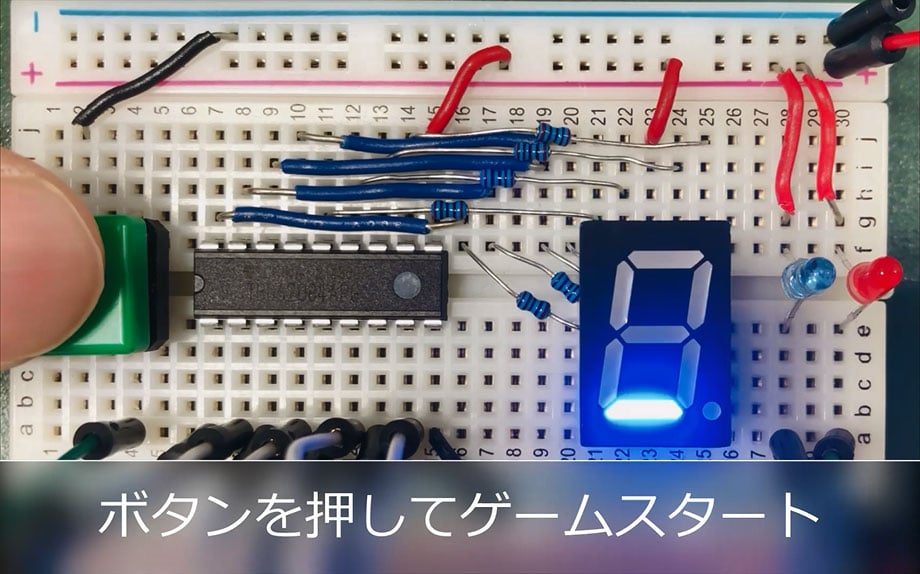
Image
Press the button to start the game
Image
Red LED lights up when failed
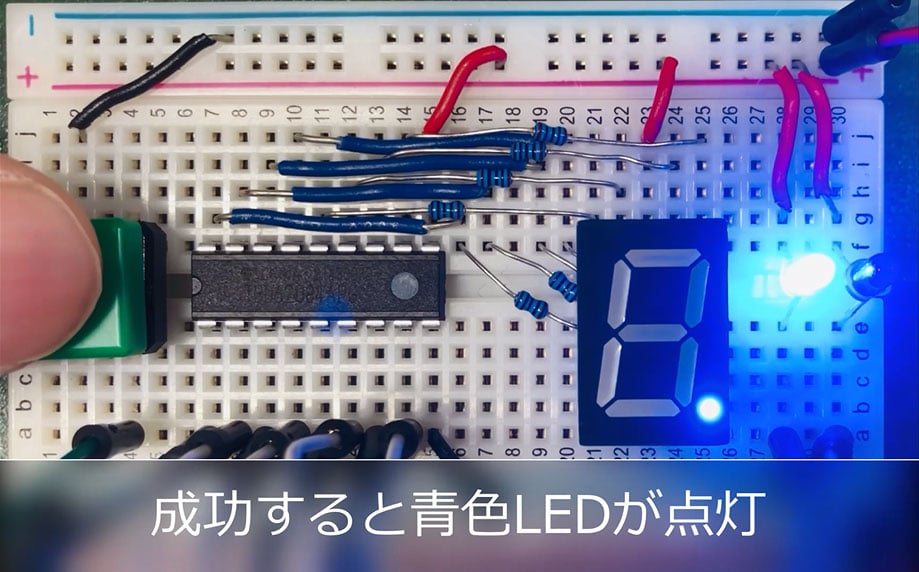
Image
Blue LED lights up upon success
That concludes the game creation process. By using the FPB and breadboard, you can connect to your PC with just one USB cable and eliminate the need for soldering work. I highly recommend using the FPB and breadboard for electronic projects. If you're interested in electronics, try creating your own project using the RL78 microcontroller.
The reference used for creating the mole-catching game is provided in the URL below. Please take a look if you are interested!
*The following URL is available in Japanese only.