

Required
- FPB-RA2E2(RTK7FPA2E2S00001BE - RA2E2 Fast Prototyping Board | Renesas)
*Jumper change (wiring cut and soldering) on the board is required. - HS3001 Temperature/Humidity Sensor (US082-HS3001EVZ - Relative Humidity Sensor Pmod™ Board)
- USB cable 1 pc(Type A–Micro B)
⇒Needed for debugging FPB-RA2E2
Operating conditions
- PC: Windows
- e2 studio: Version 2023-01 (23.1.0)
- FSP: Version: 4.3.0
1. Installation of e2-studio
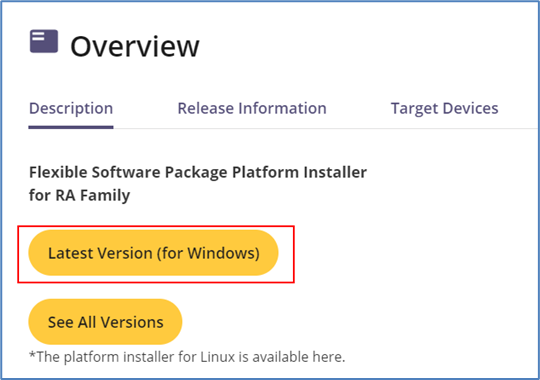
Please install e2studio, the integrated development environment for the RA family, from the link below.
*Renesas has various versions of e2-studio, but the development environment required for the RA microcontroller can be downloaded here.
e² studio -information for RA Family | Renesas
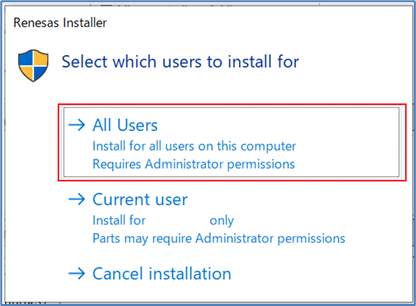
Launch the downloaded .exe file.

You can select the target users. In this case, select All Users.
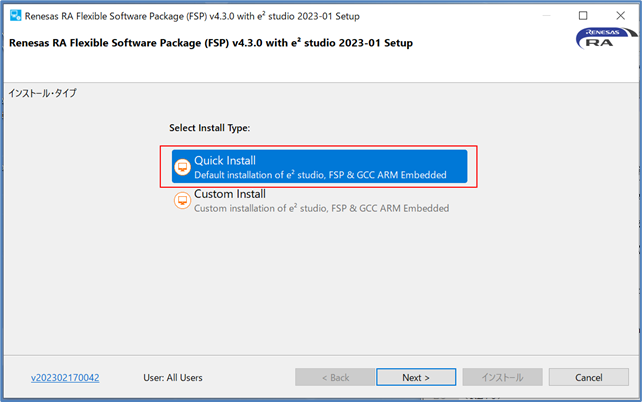
You can choose Quick Install or Custom Install. In this blog, we selected Quick Install.
Please follow the guide to proceed with the installation.
2. Download sample project
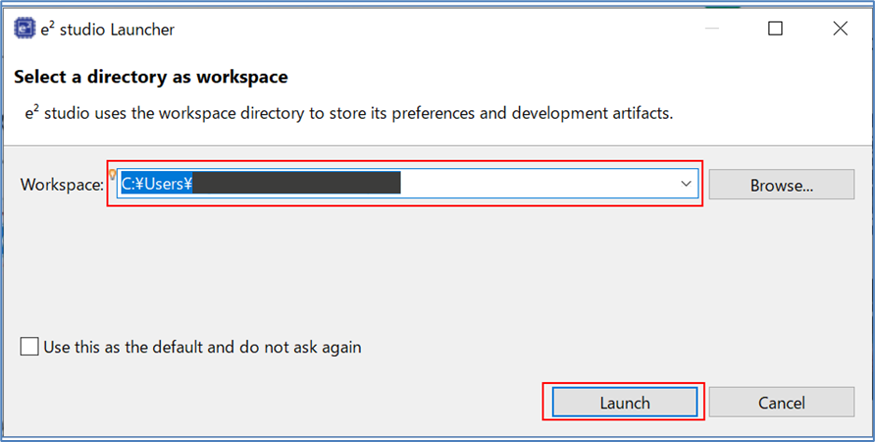
The installed e2-studio start up. Specify any workspace folder and start it up.
Enter your My Renesas account information and click Login.
*If you have not registered yet, please register newly from "My Renesas".
*After logging in, you will be prompted to specify whether you need to set up your Master Password so that it can be restored if you forget it. Please set this if necessary.

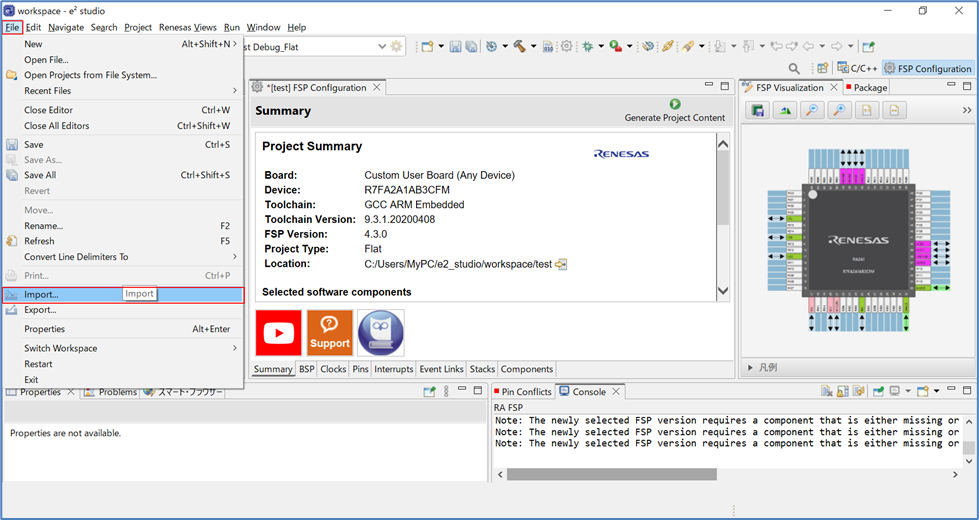
Once e2-studio is up and running, go to "File" > "Import".
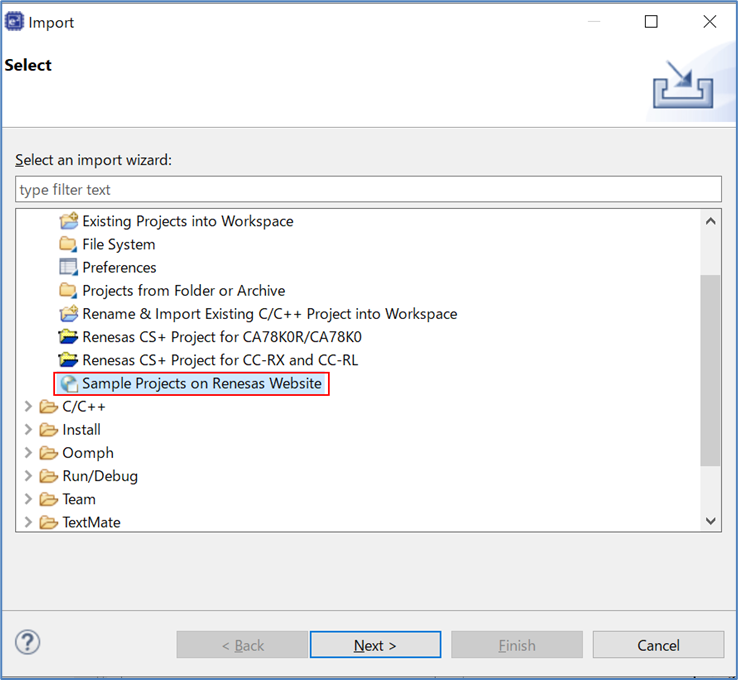
Go to "General" > "Sample Projects on Renesas Web Site" > "Next>".
(It is very convenient to download sample projects without going to the website.)
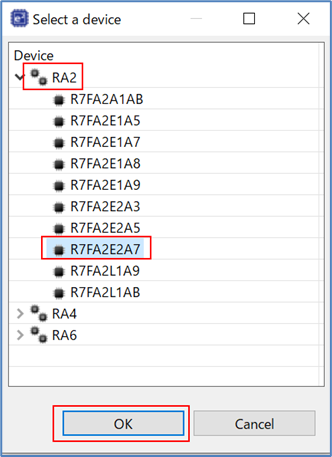
Select the device. Please select "RA" and click the "..." button.

Specify further devices. Here, select "R7FA2E2A7".
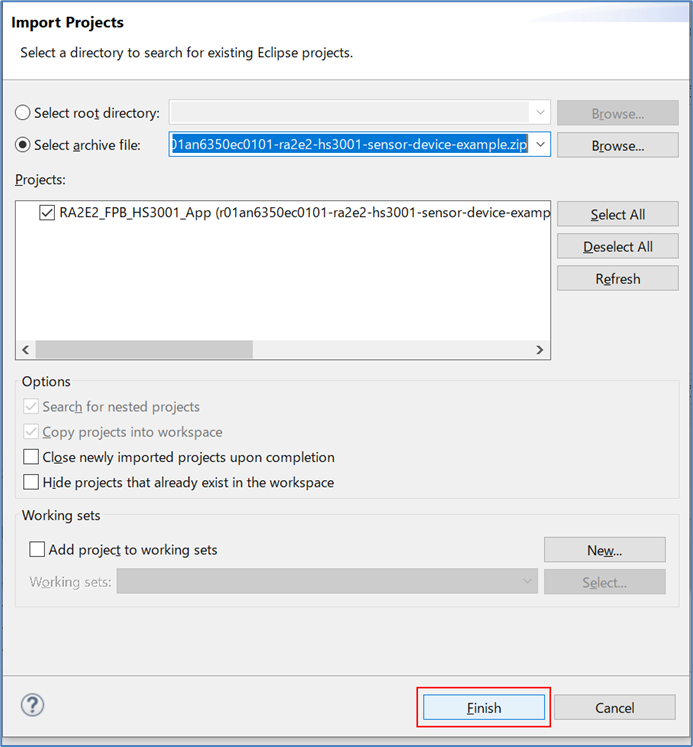
A list of sample projects corresponding to RA2E2 will be displayed. Select "RA2E2 HS3001 Sensor Device Example-Application Project" and click "Finish".
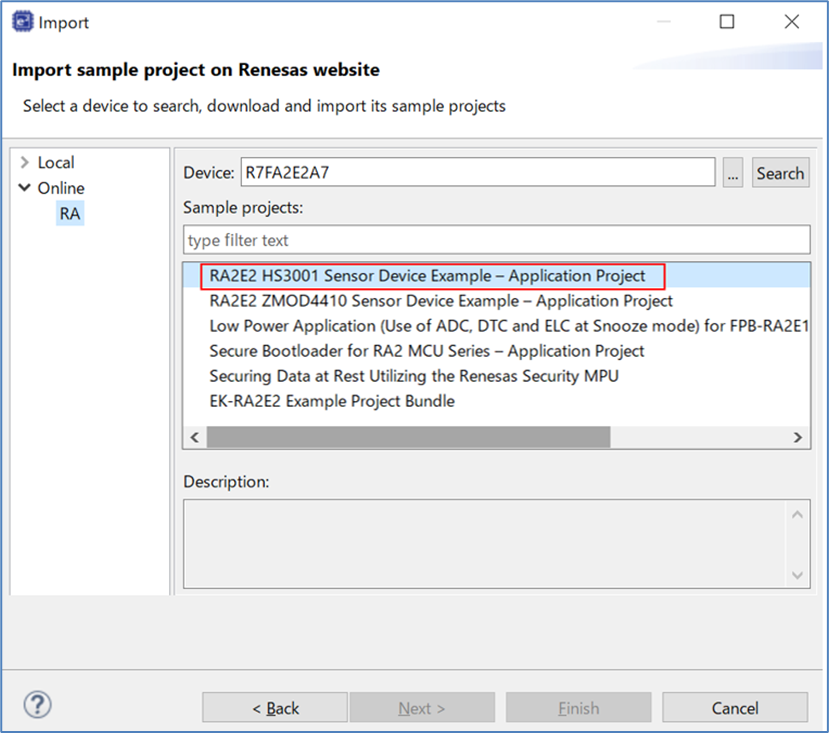
Click "Finish.
3. Build and Debug the sample project
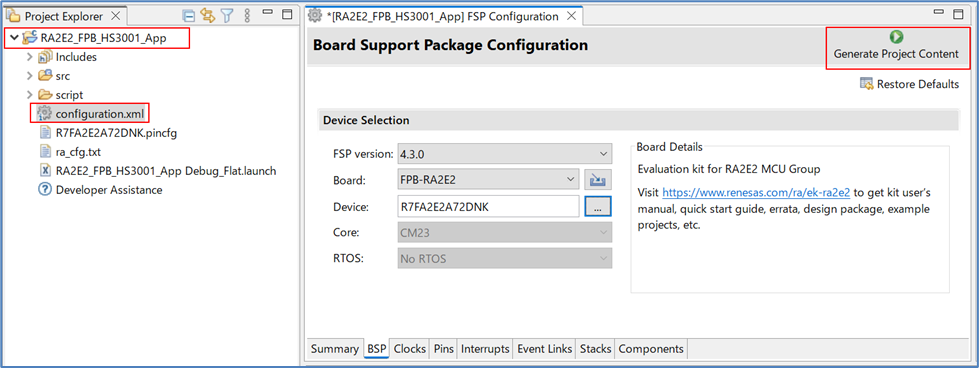
Open the folder and double-click "configuration.xml" to open the Configuration screen.
Click "Generate Project Content" to automatically generate the source code necessary for the build.
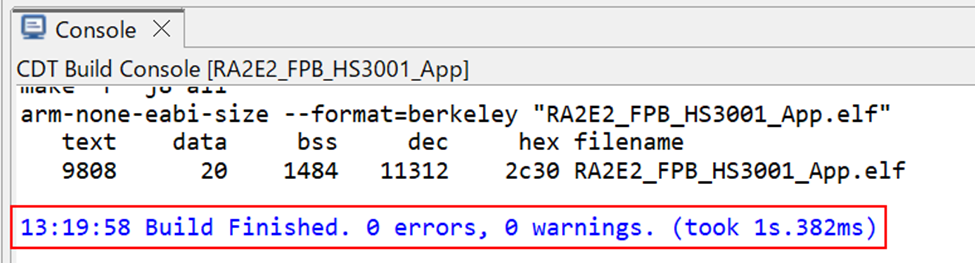
Click the Build button to start the build.

Confirm that there are no errors on the console screen.
Set up the hardware. The temperature/humidity sensor (US082-HS3001EVZ) should be attached to PMOD1 on FPB-RA2E2. Also, to enable debugging, CN1 should be shorted to Pin1 and Pin2.
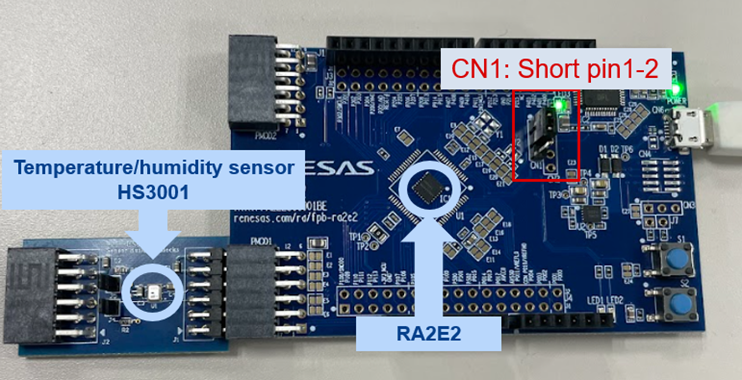
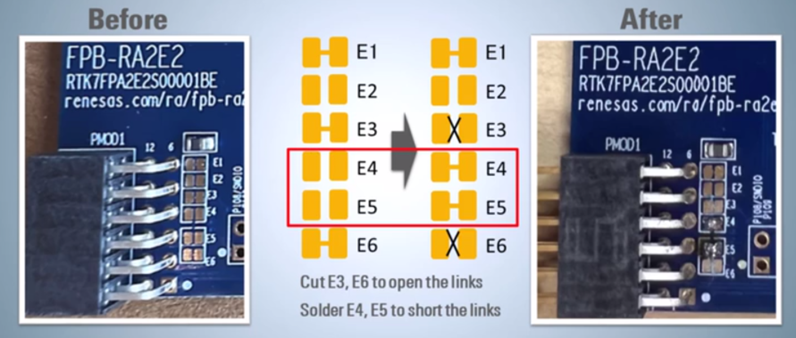
In addition, to enable the I2C interface of the FPB-RA2E2 PMOD1, the jumper must be changed as follows:
- Cut E3 and E6 to open.
- Solder E4 and E5 together to make a short circuit.
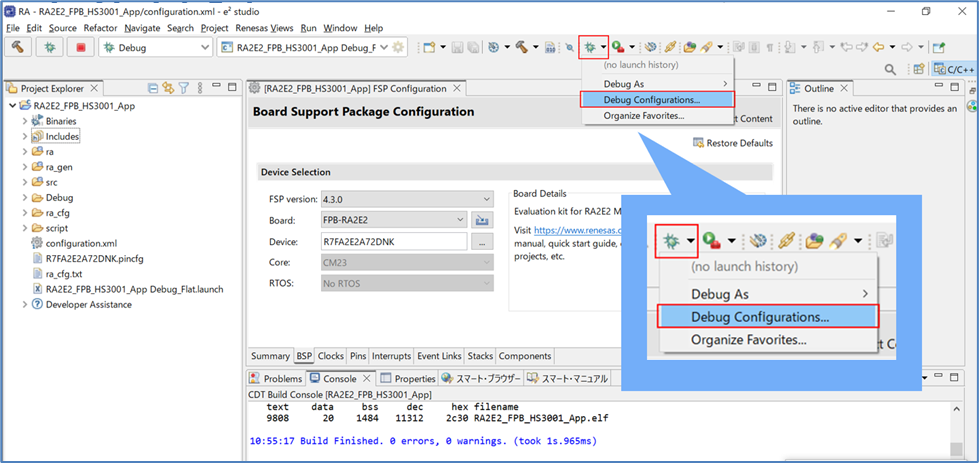
Configure the debug settings. Click the Debug button and select "Debug Configurations...".
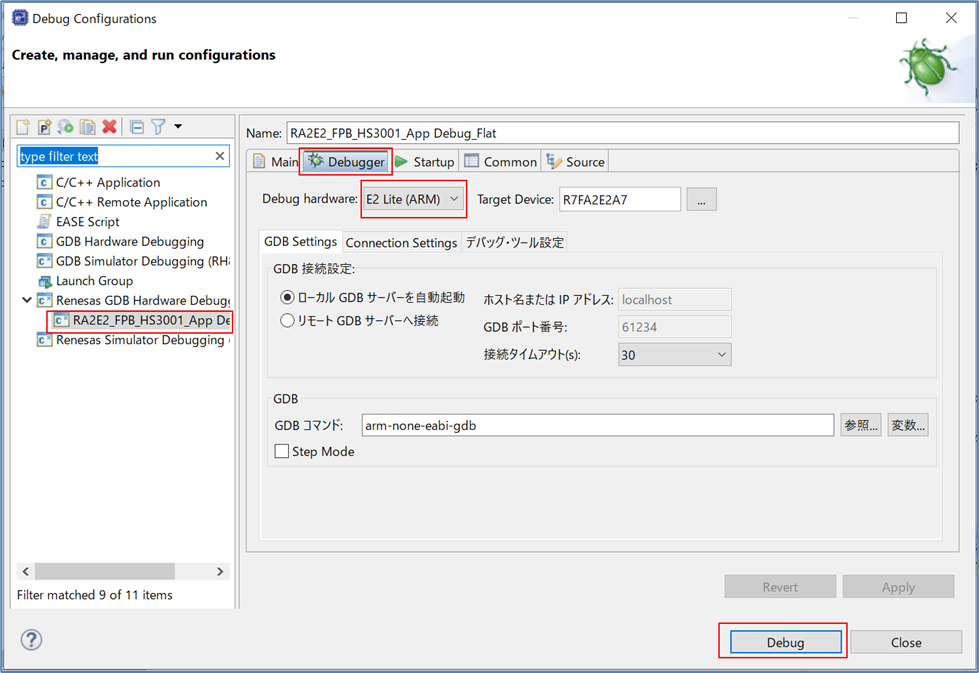
Select the target sample project, confirm that "E2 Lite(ARM)" is selected for Debug hardware in the "Debugger" tab, and click "Debug.
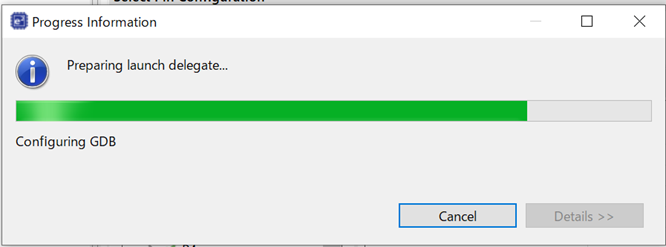
Debugging is started.
4. Check the measured value of the temperature/humidity sensor
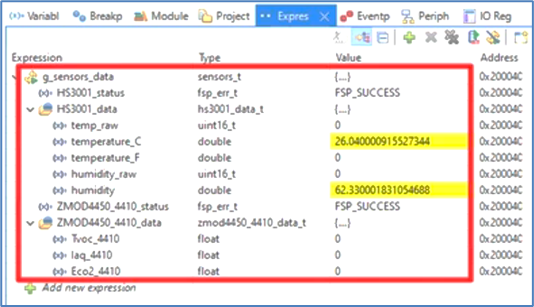
Very conveniently, the temperature and humidity sensor values can be monitored on e2-studio.
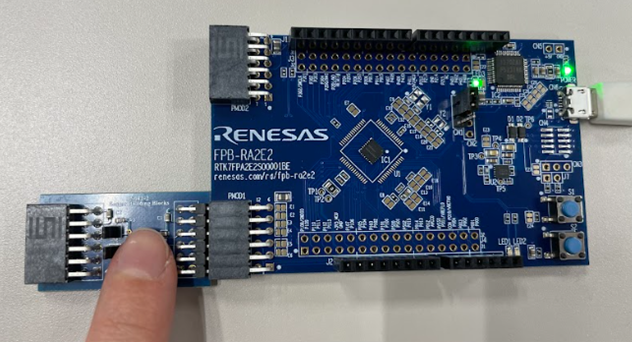
Room temperature does not change immediately, so make sure you are measuring in real time by putting your finger on it!

After debugging is complete, go to "Windows" > "Show View" > "Expressions".
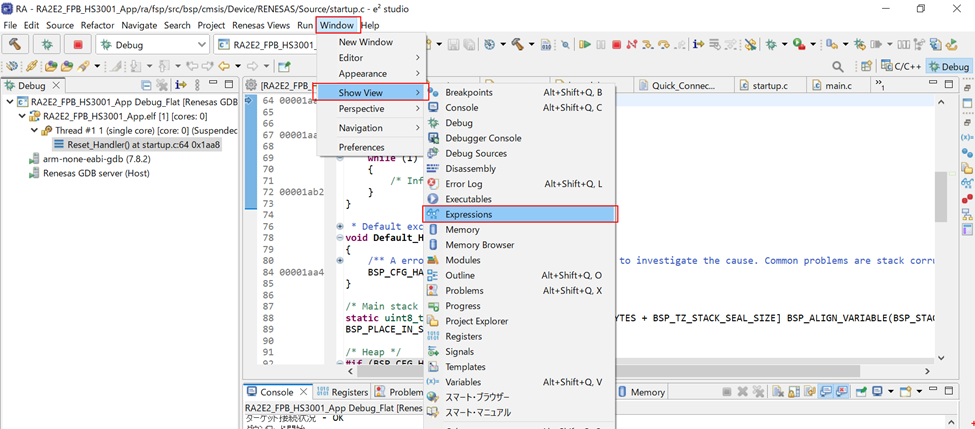
An "Expressions" screen appears in e2-studio for monitoring variables (in this case, temperature and humidity sensor readings).
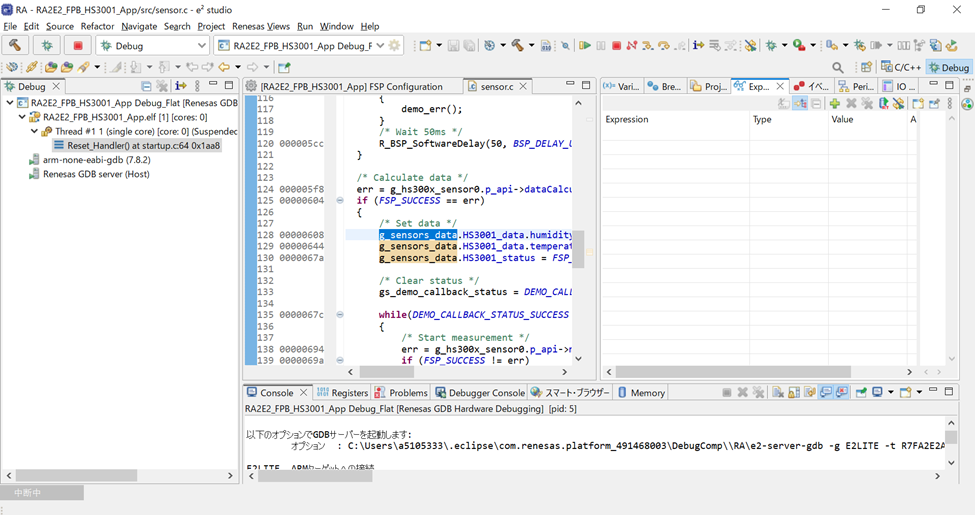
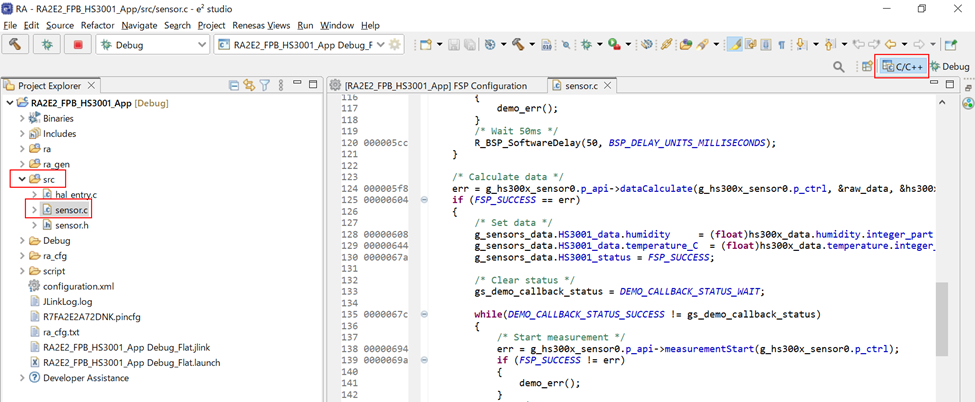
Open "sensors.c" from the "src" folder.
*You can return to the screen displaying the project file by clicking "C/C++".
Go to the Debug screen again, double-click "g_sensors_data" in line 128 of "sensors.c" and drag & drop it to the "Expressions" screen.
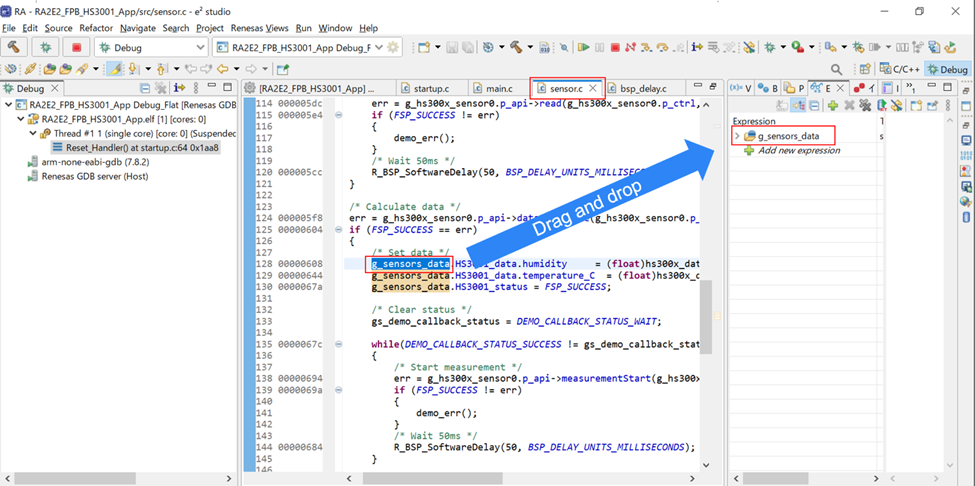
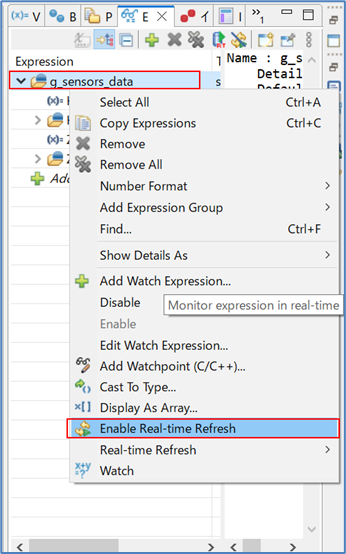
Right-click "g_sonsors_data" and select "Enable Real-time Refresh".
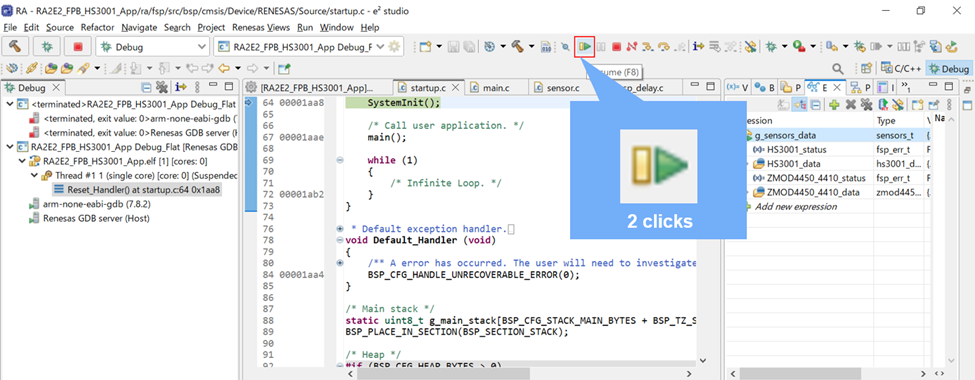
Click the Run button twice.
Put your finger on the temperature/humidity sensor to confirm that temperature and humidity are being measured in real time.
The video posted on the official Renesas website also explains the procedure for operating the temperature/humidity sensor HS3001 using the RA2E2. Please refer to it.
Video: 「Make sensor application for RA2E2 Fast Prototyping Board in e2 studio」
Make sensor application for RA2E2 Fast Prototyping Board in e2 studio | Renesas
*In this video, e2-studio is installed from GitHub, but the latest version will not change what is installed.
---------------------------------------------------------
Finally, here are some related pages for your reference.
RA2E2 HS3001 Sensor Device Example – Application Project (renesas.com)
This is an application note for this sample project. Please refer to it as necessary, as it contains information on the hardware and software used.
RA2E2 - 48MHz Arm® Cortex®-M23 Ultra-Low Power General Purpose Microcontroller | Renesas
This is the introduction web page of the RA2E2 microcontroller used. This microcontroller is ideal for IoT sensor nodes and battery applications because it not only has ultra-low power consumption but also has a lineup of ultra-small packages.
Small Prototyping Board Delivers Big Ideas | Renesas
This is a blog I have written in the past introducing RA2E2. I have summarized it in an easy-to-understand manner for your reference!
FPB-RA2E2 v1 – User's Manual (renesas.com)
To learn more about the FPB-RA2E2 used in this project, please refer to the user's manual.
RA2E2 ZMOD4410 Sensor Device Example – Application Project (renesas.com)
In this project, we used the HS3001 temperature/humidity sensor, but a sample project to operate the ZMOD4410 indoor air quality sensor is also available.
The ZMOD4410 is a sensor that can be used in air quality monitoring systems in homes and hospitals.