
Migrating between Integrated Development Environments
- |
- |
Overview
![]()
Projects that have been created using PM+ can be ported to the e² studio environment in either of the following ways.
- Convert an existing project to create a new project with CS+, and then convert the project to a new e² studio project
- Create a new project in e² studio and register existing source files
| Process | Convert an Existing Project | Create a New Project |
|---|---|---|
| Source file registration | Automatic | Manual |
| Option setting | (Partially) automatic | Manual |
| Source file folder location | Automatic | No care needs to be taken regarding the file registration location. |
| Conflict between source files and automatically generated files | Files should be modified after a project is created. | Care should be taken regarding conflict at manual file registration. |
Convert an Existing Project to Create a New Project With CS+, and Then Convert the Project to a New e² studio Project
Direct conversion of projects for PM+ into projects for the e² studio is not possible.
Use the function for converting projects for use with CS+ to convert the project into a CS+ project for the given microcontroller, and then importing project it to the e² studio.

Create a New Project in the e² studio and Register Existing Source Files
- Click on [File] -> [New] -> [C Project] in order from the menu bar of the e² studio and create a new C project. This launches the wizard for creating a new project shown right.
- Enter the project name in the dialog box and select the toolchain. Click on [Next >].
Image

- Specify [Toolchain Version], [Debug Hardware], and [Select Target] and click on [Next >] to go to the next step.
Image
![[Create Project] dialog box of CS+](/sites/default/files/media/images/migration-e2studio-new-02.png)
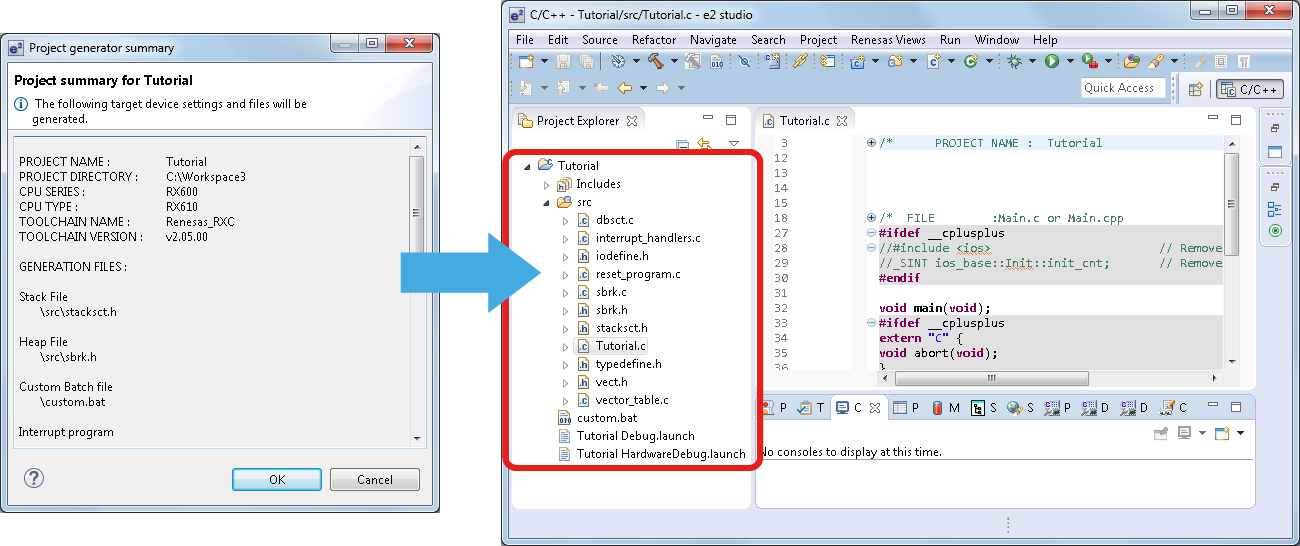
- Click on the [Finish] button after setting the required options. This produces a window [Project summary for Tutorial]. Click on [OK] and a project is generated and displayed in the e² studio as in the example on the right.
Image
- Select [Import…] -> [File System] to add an existing source file to the project. It is also possible to add new folders or files of source code from [File] -> [New].
Image
![[Import…] -> [File System] to add an existing source file to the project](/sites/default/files/media/images/migration-e2studio-new-04.png)